Maybe you have already noticed, but very often when you connect a new monitor to the video card colours are not used to the full, making the overall enjoyment of contents not as good as it should be. All this is caused by Windows and drivers that, when they detect a new monitor, set an inappropriate colour profile. With the correct colour profile in fact the blacks will be much “blacker” and, in general, colours will feel truer and much more “alive”. Now let’s see how to fix this problem.
If you have NVIDIA
If you use DVI or HDMI to connect your monitor, this small fix that will automatically set the right level of RGB (0-255). Method:
- Download the software from this LINK
- Unzip the contents into a folder to store later
- Right-click on the extracted file and click “Run as Administrator.”
- Click on the newly appeared window , “Set Full Range (0-255)”
- Restart your PC to enjoy the improvement.
If indeed you notice an improvement in the situation, remember that it will require a new adjustment of brightness and contrast.
IMPORTANT: For every Nvidia driver update, the fix will be removed and needs to be reapplied. It is therefore recommended to keep the executable file in a handy folder.
If you have AMD
- Open the Catalyst Control Center
- Go to the “custom digital flat screens”
- Go to the subsection “pixel format”
- In the drop down menu select “Pixel Format RGB 4: 4: 4 Standard PC (Full RGB )”
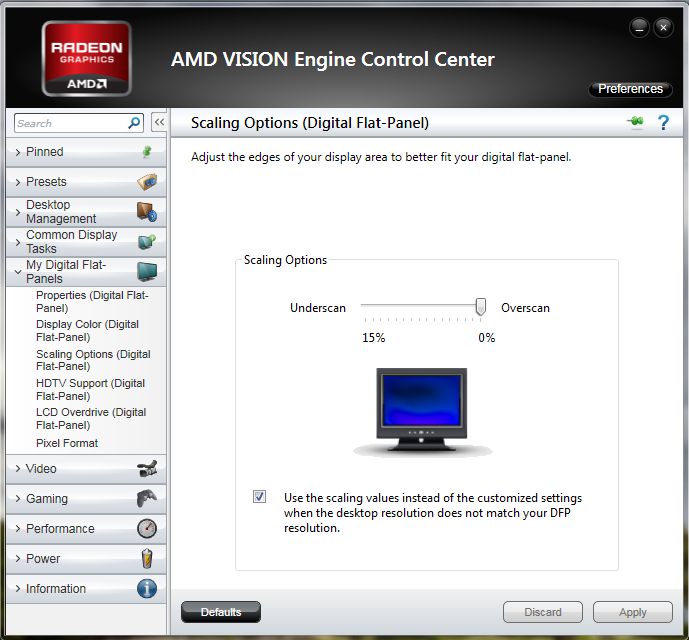
Only with AMD, in the case of HDMI connection, it is likely that the images and the contents may not be displayed full screen, with a black pixel border showing up. In this case a bad overscan setting is to blame. To solve the problem follow these instructions:
- Open the Catalyst Control Center
- Go to “custom digital flat screens”
- Go to the “scaling options” subsection
- Set the indicator at 0% and check the option at the bottom of the window.
Read More:
Best Monitor for Photo Editing
Best Gaming Monitor
