The method is simple. We need a spare hard drive or at least an accessible partition. If our hard drive has enough space, we can also free up some space for the partition that will host Windows 10. That’s the way we will do it. We just need a previously installed Windows 7 or Windows 8.
First step: Free up some space for the Windows 10 Partition
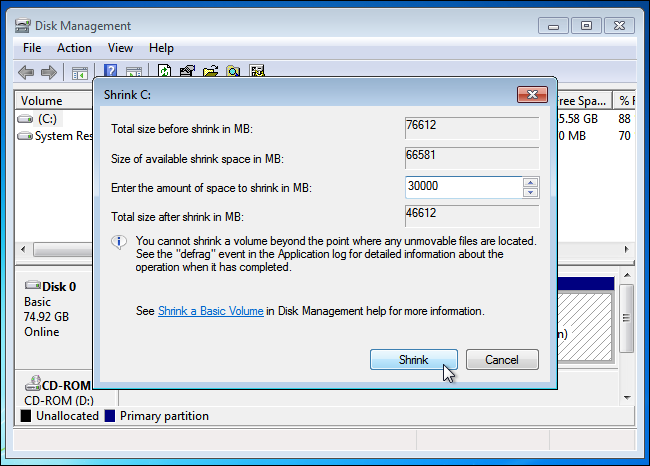
From Windows 7, the disk manager can resize partitions to make them bigger or smaller. We will free up 30 GB out of the 120 GB so we have enough space for Windows 10. It has to be unused space. It is not advisable to give less than 60 GB per System, so if you have a smaller unit, perhaps it would be better to make the installation in a separate hard drive since the installation process is pretty much the same.
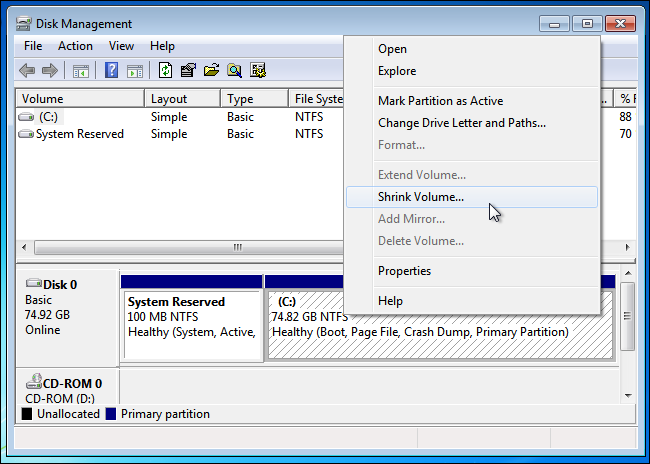
We will open the disk management (diskmgmt.msc) and look for the unit we want to resize. Right click it and then resize. We will leave enough space. By default, Windows leaves it in half. That is good enough for us. After reducing the size of the drive, we can go to the next step.
Second step: Downloading and creating Windows 10 boot unit
We can download the “Technical Preview” program’s ISO from this link: http://windows.microsoft.com/en-us/windows/preview-iso.
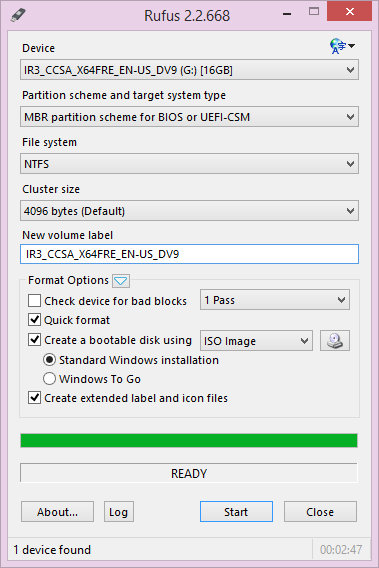
Let’s download the one that suits us better. Then we will have to create boot drive, be it a DVD or a pendrive. You can use the traditional methods or more direct applications such as unetbootin, rufus or the Windows USB/DVD Download from Microsoft.
It doesn’t matter which method we use, at the end we will need a bootable unit where we can install Windows 10. The upgrade method or the installation from Windows method don’t work for the dual boot. Maybe you’ll need to reconfigure your BIOS so that the USB unit has priority.
Third step: Booting from the Windows 10 unit
We boot from the created unit. Maybe you’ll need to reconfigure your bios so that the USB unit has priority. The boot installation menu is pretty similar to that of Windows 8, not to say the same.
Fourth step: Custom installation on the empty partition
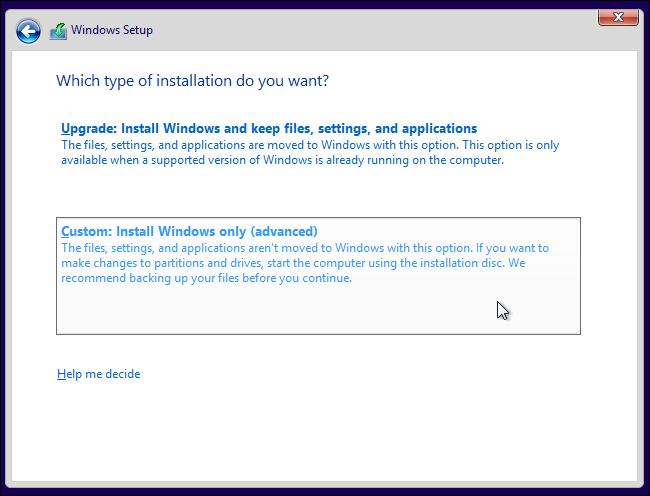
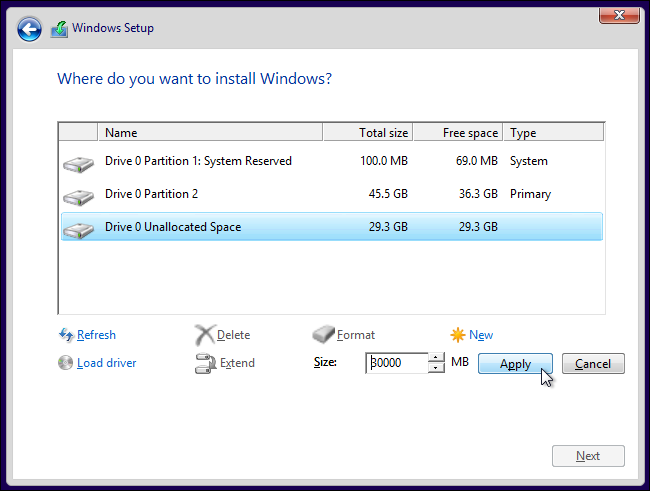
The option that we have to use is the Custom or Advanced installation. Then select the disk menu and the system partition that we freed up in the first step. We select it and then click next. From there we will follow the normal installation steps. It will take more or less depending on the capacity of our system.
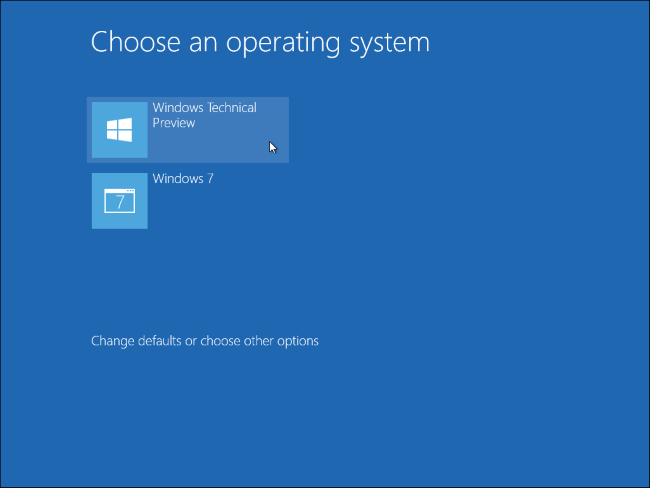
As soon as we have installed it, we will have the dual boot menu. This will give us more freedom to do a tranquil and controlled migration.
Read More:
Best Antivirus for Windows
How to create a restoration point in Windows 10