Although many people think that laptops are a type of PC that do not require maintenance for its components, laptops are precisely devices prone to accumulate dirt in critical areas, which may affect the cooling system’s performance and therefore the laptop’s overall performance. It is not uncommon to use canned air to remove dirt accumulated on the laptop’s heat sinks and fans (some users even clean them by regularly opening up the laptop). However, an often overlooked yet essential element of cooling systems is the thermal paste that works as an interface between heat sinks and the CPU or GPU.
A lot of people do not know that the low-quality thermal paste found in a lot of devices dry out as time passes by and become inefficient, so replacing it for a good-quality paste somewhat regularly will translate into impressive improvements on our components’ temperatures. Today we will show you how to find and replace a laptop’s thermal paste.
We have used a Dell XPS 15 9530 for this guide, but the general steps are the same for most laptops. Before we begin, we want to clarify that this procedure implies opening up the laptop and possibly voiding its warranty if it still is covered by it. So, we recommend you not to replace the thermal paste if your laptop is covered by the warranty. We are not responsible for the damage you may cause to your laptop.
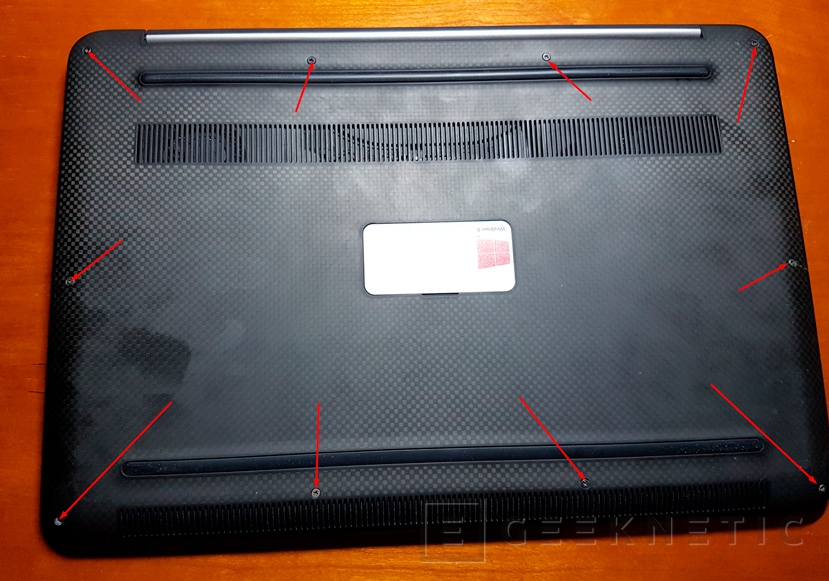
Having said this, the first step is to open the laptop and remove the bottom lid in order to get inside the laptop. In this case, doing this is really simple because we only have to remove the screws in the back, including the two screws hidden under the system badge. The process is usually similar for other laptops. In some other laptops, removing the bottom lid can be more complicated, but it usually is not hard.
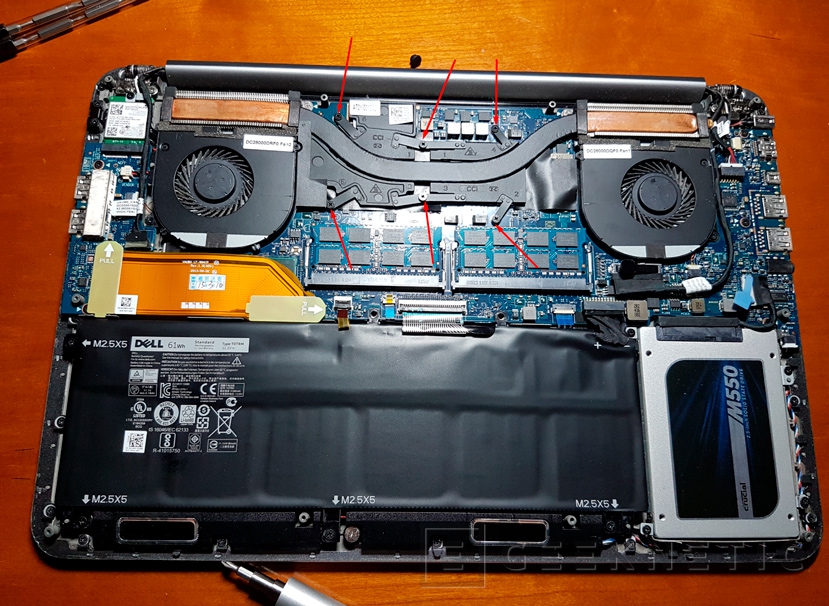
 Now we will have to find the CPU and GPU’s heat sink. It all depends on the laptop, as we can find independent components that we have to remove separately. As for the XPS 15, the GPU and CPU’s entire cooling system is the same.
Moreover, the heat sink is not attached to the fans, so we do not have to remove them. Some other laptops require carefully removing the fans.
 Once we remove the screws, we can take the heat sink off. Depending on the thermal paste and its state, there can be residues, so it is recommended to turn on the laptop for a while before opening it up to make it warm and make it easier for us to remove the paste.
We must clean off the old thermal paste before applying the new one
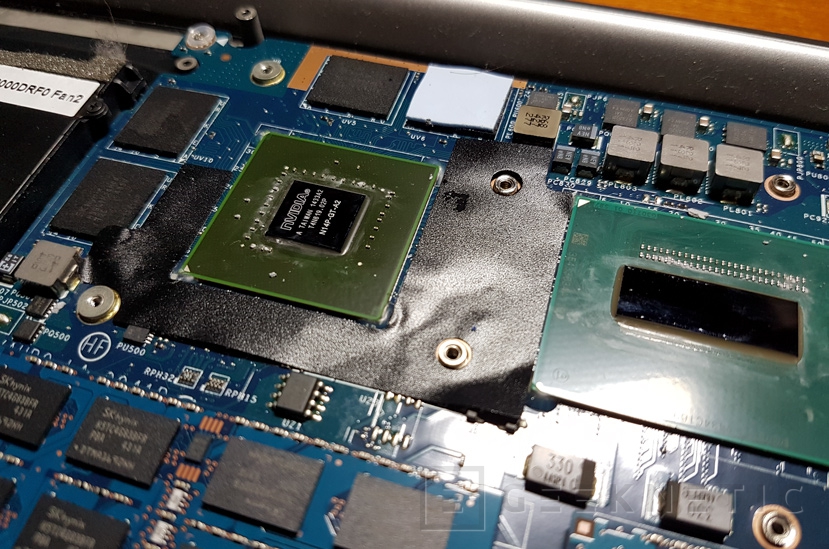
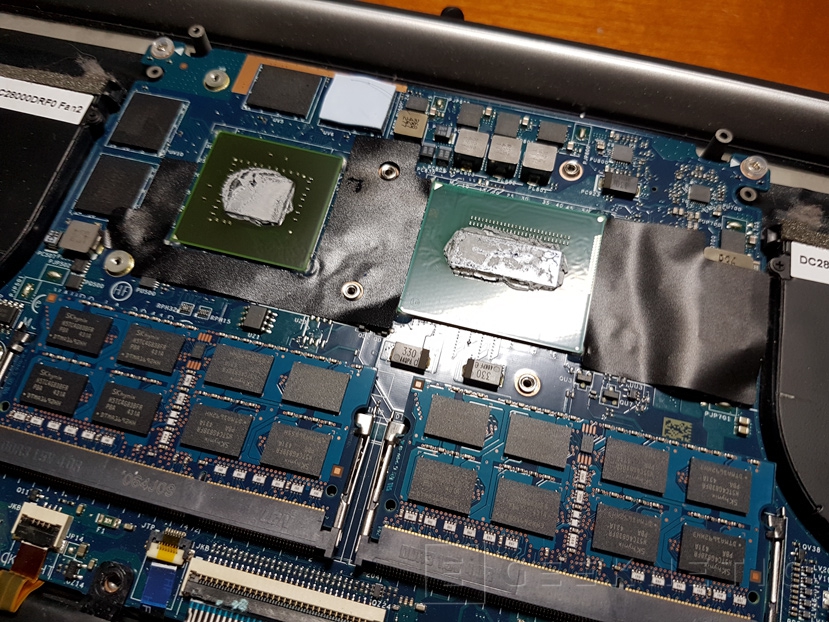 Once the heat sink is removed, we can see the thermal paste’s state. In our case, it was completely dried out where the GPU, the CPU and the heat sink are.
 We must clean off the old thermal paste, and there is a little trick for that. We can use cotton swabs to carefully clean the CPU (the larger chip in the photo) and the GPU (the square chip). In case the thermal paste is too dry, we can dip the cotton swabs in alcohol. Also, the GPU’s VRAM use thermal pads, so it is not necessary to clean them or apply thermal paste.
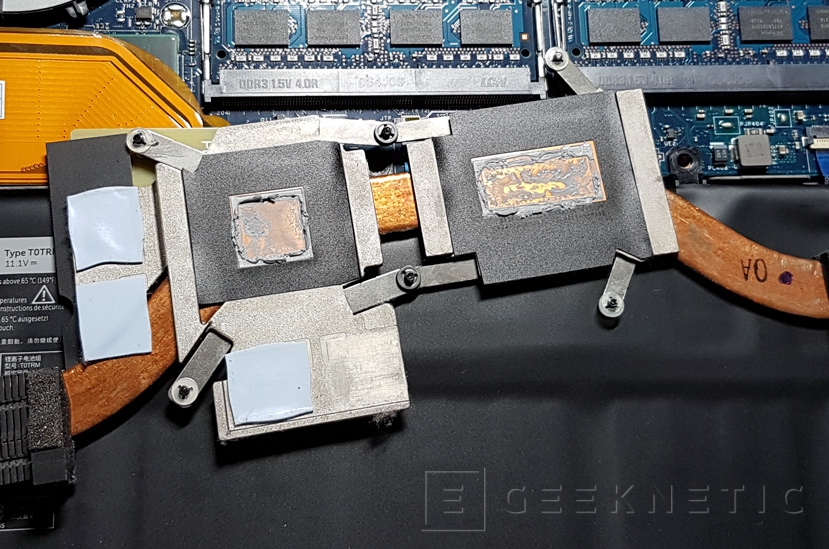
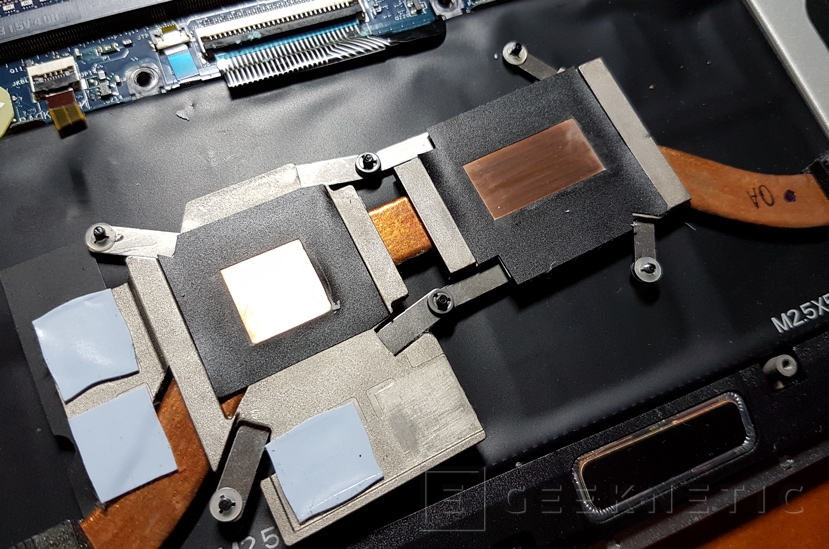
 We must remember to clean the heat sink as well.
 Now we just have to apply the thermal paste. Basically, there are two ways of applying the thermal paste: either we apply a small amount and spread it out with a credit card-sized cardboard or we apply a small amount on the center of the GPU and a line on the CPU, letting the heat sink to spread out the thermal paste once we place it back on.
The processor’s temperature decreased over 10 degrees after replacing the thermal paste
Personally, I did not notice any difference between those two methods, and I usually go for the latter. As for the thermal paste used, I highly trust Arctic Cooling MX-4 due to its good performance and because it is not electrically conductive, which is something to be thankful for when applying it on such small places. This means that getting a bit of thermal paste on other components will not cause short circuits or any issues.
Once the thermal paste is applied, we have to put the heat sink back, get everything set and close the bottom lid. In our case, we reduced the processor’s temperature by about 11 degrees while charging after applying the thermal paste. We went from 97 degrees while rendering videos with Sony Vegas to just 86 degrees. The GPU, however, faced an 8-degree drop in temperature.