Skip to content
Home » How To » Page 16

How To

How to run Windows 10 from a USB flash drive

This actually could also be applied too to Windows 8 or Windows 8.1 but it’s certainly more interesting and more challenging to do it with Windows 10. The process requires a USB flash drive with at least 8GB, though I wouldn’t mount it if we are going to use it for real in less than 16GB, as this must always be done in USB 3.0 USB flash drive with acceptable speeds.

The first thing you need is an already functional Windows 10, as the “bcdboot” command that we will use in one of the last steps required needs to be Windows 10 version of to generate the dunk images for the Windows 10 boot. You can virtualize it or use any of the piece methods that we have tried here in this section. You must also have an ISO installation of Windows 10. You can find it in the Windows 10 Insider program.

Read more

Control the number of Chrome tabs to limit the use of RAM

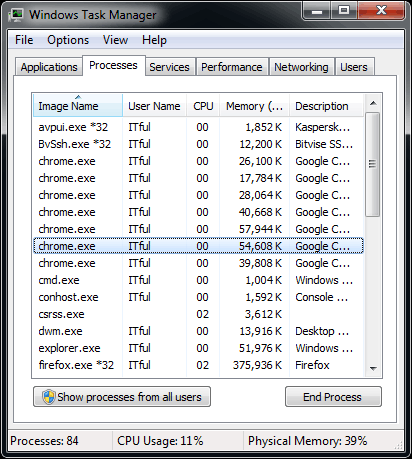
Any modern Operating System works well with 1 or 2 gigabytes of RAM. The problem is when the most common tool used in a computer – generally being the browser – takes control and saturates our system, especially in hogging all the RAM. Modern browsers use “sandbox” systems to isolate processes and to protect themselves and our systems, leading to a lot of RAM consumption.

Chrome

This trick is specially recommended for computers with 1 to 4 gigs of RAM, where we want to keep an eye on our browsers RAM consumption. This way we will saturate it less and we won’t have to manually take care of it every time.

Read more

Upgrade Windows 7 or 8.1 to Windows 10 from the Windows Update

If you would like to upgrade your Windows 7 or Windows 8 to the newest Windows 10 but the previous installation option seemed too complicated, this is for you. This is the easiest and safest way to install Windows. Right from the Windows O.S, using the Windows Update option.

1: Before installing Windows 10

Normally, if you wanted to try any of the Windows versions prior to their official release, you needed to download the ISO file from Microsoft’s website and then create an installation disk in order to install the new Windows onto your PC.

This is now a thing of the past for Microsoft.

Read more

How to correctly apply thermal paste

Thermal paste (also called thermal silicone or thermal putty) is a substance that improves the conduction of heat between the surfaces of two or more objects that may be irregular or not be in direct contact. Thermal paste is used to join (paste, in a way) the processor with the base of the heat sink, improving the passage of heat from the processor to the heat sink to dissipate the heat generated by the CPU. Application of thermal paste isn’t at all difficult, but we have to be careful; if we use too much, we might achieve the opposite of the desired effect and end up raising the CPU’s temperature. So be patient and be careful.

Definitions

Before beginning, let’s clarify a few terms to ensure that we apply the thermal paste in a determined manner.

  • IHS: Integrated heat spreader. A small metallic sheet that covers the processor, this mainly protects the
  • DIE: The most internal part of a processor. Basically, it’s the processor in and of itself where you’ll find all the cores, memory, cache, etc.
  • PCB: The base plate of any component. For example, the base plate that holds all the components of the graphics card. May be green, blue, black, and so on.

What is thermal paste, really? And why is it necessary?

The IHS of current processors isn’t 100% smooth and without malformations, and neither is the base of heat sinks; thus, if the IHS and the base of the heat sink aren’t in complete contact, heat can’t get to the heat sink and the temperature of the processor will increase. For this reason we need thermal paste, which better units the processor and the base of the heat sink, getting around any malformations or irregularities that either may have.

Read more
How to activate the silence button in Google Chrome

If you’re a regular user of Google Chrome, you’ve surely noticed that when a website has audio, the speaker icon appears on the tab. Although it is a practical function by default, today we show you a trick to transform the icon into a button that will allow us to silence any website without the …

Read more